Gone are the days, when you had to run to a car mechanic, for any trouble in your car. The advancement in car technology has made it possible to detect it through the diagnostic computer.
The automotive scan tool is an electronic device that is connected to the onboard computer and can test the systems of your car, diagnose the areas of faults and re-programs the control modules.

What is an Automotive Car Tool?
When programmed perfectly, your car engine makes adjustments of the required fuel mix, ignition coil, and fuel injectors. If you are a home repair enthusiast, you will be happy to use an automotive scan tool. You need to understand the error codes when the Malfunction Indicator Lamp (MIL) lights up to give you access to the scanner.
Starting with Handheld code reading, the latest Automotive Scan Tools can now be bi-directional functioning and can be programmed, as desired. The following are the three main types.
Diagnostic Trouble Code (DTC) Readers
Data Link Connector or DLC with bi-directional computers
On Board Diagnostic or OBD that feeds the performance of your car, directly into the car
You can link the software programs or the handled diagnostic tools to your desktop or laptop by interpreting the error codes; you can analyze the performance levels of your car. When the warning light is on, it conveys to you the exact problem and can give advice in fixing certain problems.
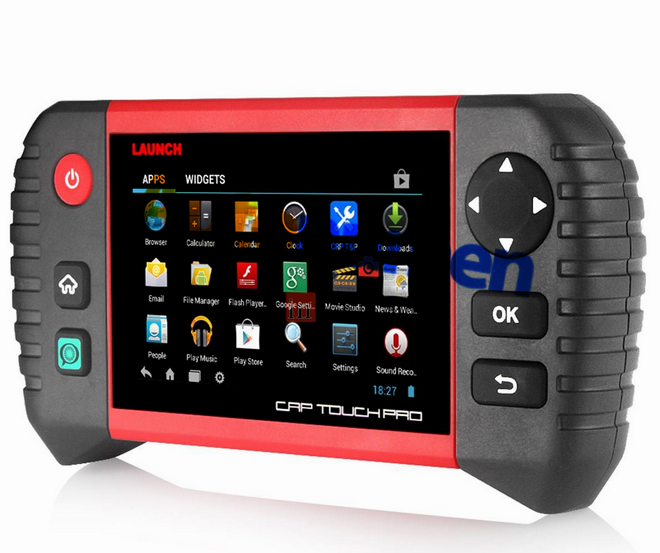
Most Common Models
BAFX PIC 18F2480 which is ODB II enabled by a Bluetooth and can check 3,000 trouble codes. It can be Wi-Fi linked to a computer
Actron CP 9125 is meant for novice and is a pocket scan code reader
Autel Multi-Scan MS 300 has ODB II and can retrieve DTC codes. It is suitable for most cars made in the US, Europe or Asia. It is cheaper and more versatile.
Scan Guard II can scan OBD II codes. It can program 37 parameters; like cost per mile, temperature of the engine
Actron CP 9580 can identify trouble codes; including ABS codes and provides solutions for the same.
Just as you are supposed to know different automotive parts and their respective functionalities, you must know the step-by-step process of using your scan tool; such as below.
Step 1: Use On-Board Diagnostic (OBD) II
It is an improved version of OBD I that started in 1994. There are different codes for different faults of your car. You need to learn them. While using OBD II, if the Check Engine light comes, it indicates a failure that may affect the emission and many other problems. Unless all the problems are set right, the light stays, and the code is stored in the computer memory for a definite number of on/off cycles. You can erase it immediately by using the scan tool.
The OBD II scan tester helps you to find answers to simpler problems. It also indicates the possibly of more complicated areas. Then, you can set them right perfectly.
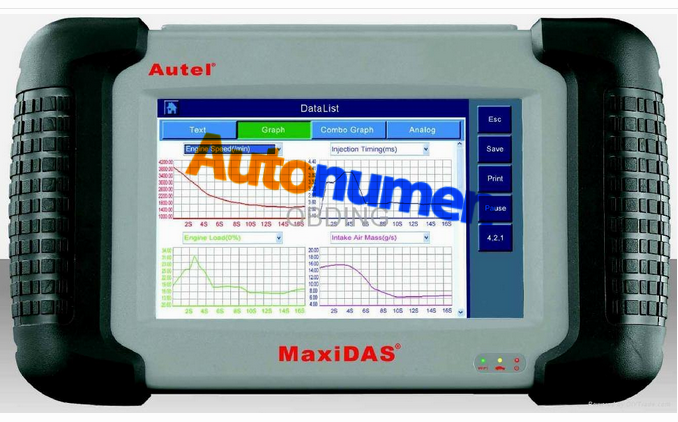
Step 2: Interpreting the Code
By using and OBD II, you can know certain data related to the operation of your engine, such as the timing of ignition, rotation per minute (RPM), calibration of fuel injection. There are a number of sensors that perform these functions. They are mass airflow sensors, throttle position, oxygen; barometric sensors.
Switch position signals and calculator load value. The capture mode of the OBD II enables you to take a brief view of the readings made by other sensors, at the exact occurrence of problems while driving.
Step 3: Sensor Scan
With the scan tool, you can find out any other problem, not responsible for the warning light of the car engine. The latest generic code is PO713. It is commercially known as Sensor Circuit for Transmission of Fluid Temperature.
If the transmission fluid becomes too hot, there may be an immediate failure of the transmission. Just sitting in the driver’s seat, you can troubleshoot many problems by pushing a button, located on the tester. You can check any excess generation of temperature on the computer.
Step 4: The Manner of Data Transmission by OBD II
The Powertrain computers are designed to circulate information from sensors and switches to other computers which control transmission, air-conditioning, safety systems, and suspension. These computers also control systems that are responsible for the emission of the engine; it helps the technicians for evaluating troubles.
Step 5: Linking a laptop to Automotive Scan Tool
Instead of a Handled Scanner, you can use your laptop or PC with the help of a kit. The following is the process of Linking OB II kit to a Laptop:
You can buy the laptop OBD2 Diagnostic Tools, either over the counter or online.
Insert the disc for software installation and complete the installation process. If not, you have access to the “my computer’ and double click on the disc.
Connect to your laptop by using an USB to without serial ports. Then connect the OBD II diagnostic port cable.
After starting the program of the software, ensure to double-click the desktop icon if the program does not automatically. Be contented with the control interface
Get your laptop into your car and turn the ignition, ‘on,’ without cranking the engine. Now, connect your laptop to your car’s diagnostic port; below the steering wheel
If required, click the “scan button” that you find on the control interface. Have as look at the engine codes and information related to diagnosis given by the program
How to Choose the Best Jumper Cables?
A Jumper cable is required for jumping start or boosting a discharged battery start the battery and ‘jump’ you care. For this, you have to connect your discharged battery to another charged battery of a car. The external battery recharges your discharged battery and provides power, enough to crank the engine. If your car starts, the usual charging system recharges your car battery and will restore the charge of the battery
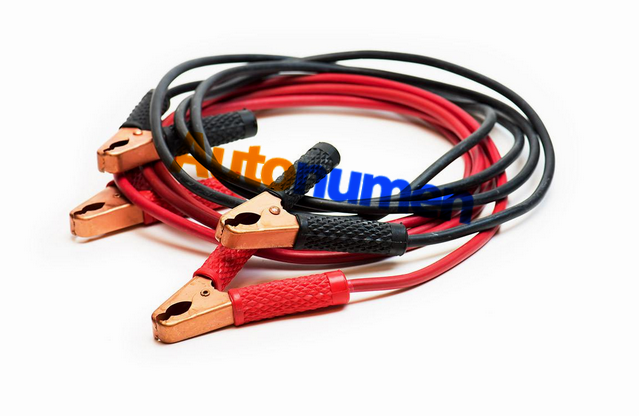
Jumper cables; also known as booster are a pair of insulated wires, fitted with alligator clips at each end. These clips are insulated to avoid, accidental shorting. The clips are made of copper or steel and are colored black and red with (=) and (-) signs to indicate polarity.
To choose the best jumper cables, you should take the following into consideration
Gauge and Width: The lower the gauge, more power will pass. You may find six gauges, suitable for your purpose
Clamps and Lengths: As the name suggests, the clamps should be as sturdy as that of alligator teeth and should have a strong I should have rubber coated handle to avoid shock. The length should be 12 feet or longer.
Starting the jump: Connect the positive and negative terminals of the discharged battery to those of the charged one, respectively. Start the boosted car and allow it run for few minutes. Then tart your car
Finishing UP: Once the dead battery starts, remove the connections and the cables in the reverse The black cable is removed from dead battery then the boosted car
With the automotive scan tool, you have the comfort, smoothness of drive and the least chances of being stuck off. You know what all are happening in your car. And if you take the trouble of carrying a jumper car with you, you can ease out of any battery trouble.
Leave a Reply