This blog post will cover how to code your RNS510. Depending on the features of the vehicle you retrofit your RNS510 into, some coding may be needed to ensure all features are working properly. We offer coding services if you do not have a Ross-Tech VCDS Cable. Just send us a message before you purchase your head unit and we can code your unit for you, free of charge. The most common coding necessary are the following:
Adjusting Amplifier Settings (Indicating if your vehicle has the Dynaudio Audio System, Fender Audio System, or Base Non-Amplified Audio System). No sound may output from the RNS510 if this setting is incorrect
Toggling BAP+ Communication. If your vehicle has a Red Highline Instrument Cluster (MFD+), BAP+ communication must be toggled OFF. If your vehicle has a White Higline Instrument Cluster, this setting must be toggled ON
Changing the interface theme (Between base, Premium or Sport). This simply changes the colors of the menus of the RNS510.
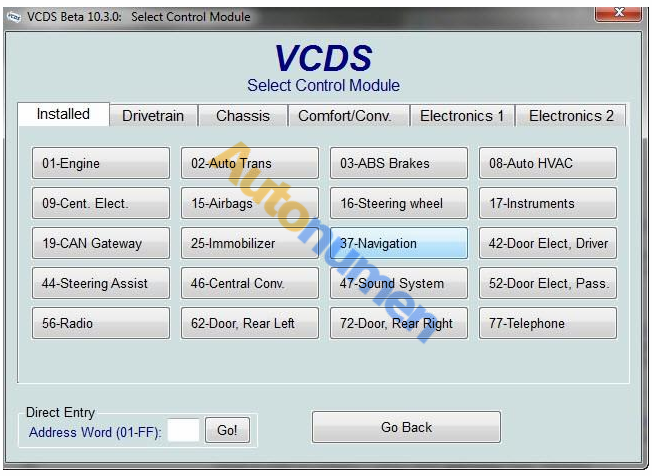
First, plug your VCDS cable into the OBD2 Scan Tool port of your vehicle. Then connect the other end of your cord into your compatible Windows PC (32 or 64 bit version). The key must be turned to the “ON” position. Click the 37-Navigation Controller
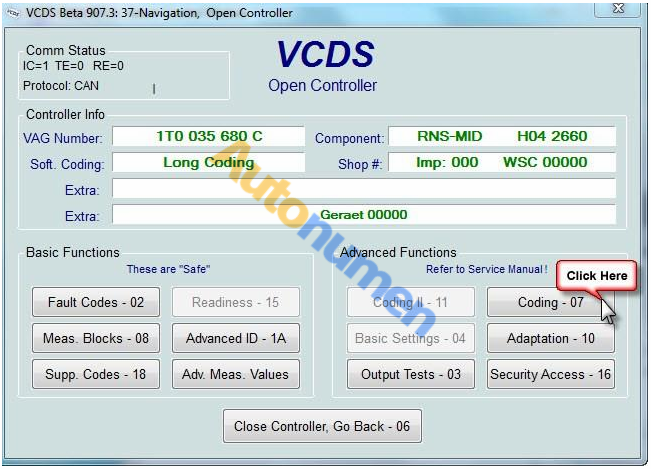
Click Coding – 07 under Advanced Functions r
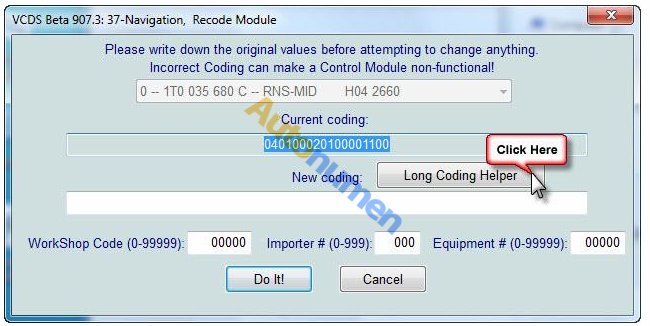
Click Long Coding to enter Long Coding Helpe
To toggle BAP+ communication, Move to bit 7 and check/uncheck Bit 7 labeled Communication Instrument Cluster … (BAP). This must be unchecked if your Highline display is Red, and checked if your display is WHITE.
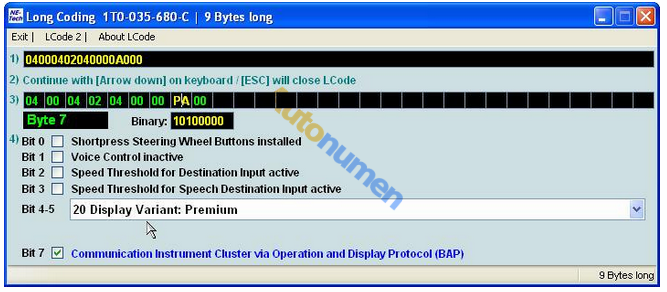
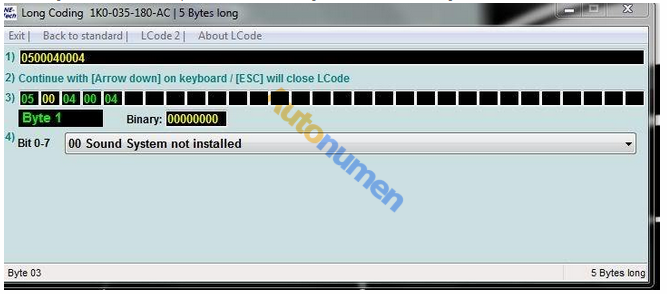
To change the Amplifier settings of the RNS510, move to Byte 1 and select your Amplifier in the drop down menu. The options are Sound System not installed, Dynaudio Sound System, and Fender Sound System. Select the option which reflects your vehicle’s audio system.
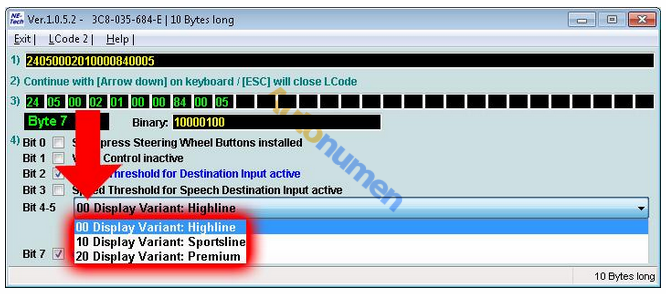
To Change the theme of your RNS510, Move to Byte 7 Bit 4-5 and select the Variant in the Drop down menu.
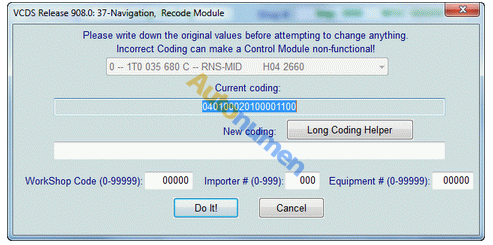
When all settings are changed, click exit. A prompt will display with the new coding and an option to Cancel or “DO IT”. Select “DO IT” to save your changes. A prompt should then appear to alert if your changes were saved or not.
Note: For most changes to take effect, the RNS510 must be reset using the following button combination:
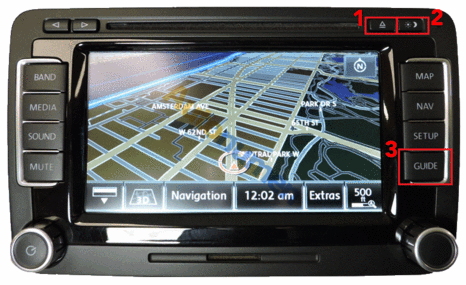
Press and hold the Eject, Night/Day button and the Guide button. The Night/Day button will appear as a Voice Command/Star button on newer RNS510’s. Once the button combination has been pressed and held for a few seconds, the RNS510 will reset and display an image with red bars on the top and bottom of the screen. Wait for approximately 30 seconds for the RNS510 to complete the reset process.
Note: This button sequence is for North American RNS510 units. International models may use a different button sequence.
http://www.autonumen.com/category-135-b0-VAG+Diagnostic+Tools.html
Leave a Reply